


Creating chatbots is fun. With a variety of tools like AWS Lex, you can build conversational bots for business or for entertainment and use them in any text-powered applications.
Implementations of conversational bots may include hailing a taxi, setting medical appointments, organizing calendars, shopping or money transfers.
In this article I will guide you through the process of creating an AWS Lex-based weather bot for Slack. First, I wanted to test the possibilities of this Amazon service for building conversational interfaces. I chose Slack as we use it on a daily basis at Apptension.
Before we continue with a step-by-step tutorial of how I approached developing my weather bot, let’s take a quick overview of how chatbots work.
How chatbots work
At first glance, chatbots look just like other apps. They consist of an application layer, a database and APIs of external services. But in order to understand the user’s intent, chatbots need to be trained with the data.Based on how bots work, we can name three systems of classifying chatbots:
- Rule-based systems (aka pattern matching) – these are bots that use patterns to match queries like “Call <somebody>”, “Book a hotel in <city>” with the correct answers.</city></somebody>
- Artificial Intelligence – these bots use machine learning to select a category (intent) for the input phrases.
- Hybrid – a program that uses pattern matching, but is also backed by the human customer support.
A chatbot workflow looks as follows:

As you can see, the workflow consists of two components:
- The natural language understanding unit is responsible for natural language processing to decide which intent has to be selected (based on pattern matching or using ML techniques).
- The dialog manager holds the state of the conversation, keeps track of the selected intents as well as the slots, and communicates with the NLU unit to ask for the missing values.
Below, you can see how the raw input text is being processed by the natural language understanding unit. The main purpose is to extract the structure of a sentence from the raw input, using the following scheme:

As in any natural language algorithms, the first step is to tokenize and clean up the raw input.
Tokenization splits the raw input into a sequence of “words”, removing the articles, prepositions and other parts of sentences. Next, using this tuple of words, the algorithm builds a structure tree out of the sentence. Tokenization is basically breaking up sentences into words.
By using the tree, we are able to get a partial representation of where the main verb in the sentence is (eg. like which is the function) and then, in the final representation, we can assign the main noun (e.g. John) and the subject of the action (like) to be cat.The interaction between different components may look like this:

This particular workflow corresponds to the bot that I’ll describe later on in my weather bot example.
DialogFlow vs. AWS Lex: Examples of bot platforms
If you want to develop a chatbot, you can create one from scratch, or you can use a platform like Amazon’s AWS Lex to do it in an easier way.
To give you a better overview of possibilities of such a service, I’ve compared AWS Lex (the one I ended up using for this tutorial) with Google’s Dialog Flow (another popular chatbot platform available).
DialogFlow:
- Supports multiple languages (also multilanguage agents)
- Cooperation with backend via webhooks (not limited to Google services) or custom Cloud Functions
- Integrations with: Slack, Facebook, Twitter, Skype, Kik, Telegram, Amazon Alexa, Microsoft Cortana, etc.
- Enriched response cards for different integrations (eg. Slack, Facebook)
- Voice response via Google Assistance (using SSML format)
- Prebuilt agents that can be added to the project
- Small talks: simple agents that enhance personal experience (responding to “Hi”, “How are you”, etc.)
- Easy access to session attributes (so-called context)
- Intents can be triggered by button click, etc., not only by text recognition
AWS Lex:
- Only US English
- Cooperation with backend only via AWS Lambda
- Integrations with: Slack, Facebook, Kik, Twillio SMS, (it’s possible to export chatbot to Amazon Alexa platform)
- Enriched response cards for different integrations (eg. Slack, Facebook)
- Voice response by using AWS Polly service (using SSML format)
- Session attributes only available via API
DialogFlow is a more mature product at this stage, offering multiple integrations with external services and backend resources. However, if you work inside an Amazon ecosystem, then Lex may seem like a more natural choice.
Now, as you know how chatbots work and what tools you can use to create one, let’s take a closer look at my weather bot, developed with AWS Lex.
Creating a bot: Weather information on Slack
I’ve divided this examples into 5 steps, so we can discuss them one by one at every stage of developing a bot. These steps are:
- Creating a bot
- Adding the engine
- Testing the bot
- Connecting with Slack
Let’s start with setting our bot with AWS Lex.
Step 1: Create a bot
AWS Lex projects are composed of three objects:
- Bot
- Intents
- Slots
The figure below depicts the relationship between these elements. As you can see, a bot has to consist of at least one intent.

The intent is what the user asks for, and will be executed whenever the intent is selected by the NLU module and all required slots are filled up. Intents are defined by a set of sample sentences, which are used to train the model, and slots. The sentences should be defined in such a way that they contain slots.
For example, if we have a slot type City, then one of our sentences could be Show me the weather in {city}. Now, the underlying ML uses this combination of sentences and slot types to train the model.
Slots are used to fetch the parameters required by the intent to fulfill the user request. There are two types of slots: the predefined and the custom ones. Amazon Lex supports built-in slot types from the Alexa Skills Kit.
Apart from the predefined slots, we can define our own slot type using a dialog shown below.

Here, you have to specify your Slot type name and its Description. Then the Slot Resolution defines whether allowed values are restricted to the defined list. Alternatively, you can set Slot Resolution to expand slot values, so they will be used as training data.
With the enumerated restricted list of values, you can specify the synonyms that will be resolved to the declared Value.
Set up your project
We start the project from creating a bot, following the image below. First, you have to select if you want to see the sample bots or if you want to create a custom one. We will continue with the second option.

The following fields need to be specified here:
- Bot name - contains the name of your bot, however, it’s restricted only to letters without spaces.
- Language - you currently have no other choices than English.
- Output voice - select if the bot produces sound output and what voice will be used to synthesis output.
- Session timeout - controls how long AWS Lex will keep the context, the slot data and any of session attributes. This can be set between zero and 1440 minutes (24 hours).
The last question is if the bot is a subject of COPPA.
The result is the following dashboard of the bot:

At the top you can see the name of the bot and a dropdown list with its version. Use the Build button to create a bot, which can be tested later on. By clicking Publish button you will push the bot live.
From the list on the left side of the screen you can create a list of intents and slot types your bot will use, that will be visible in the central part of the screen. The right panel is where you can test your bot.
Step 2: Define intents
To define intent, first you need to name it. The rule we discussed when naming the bot applies here, too.

Now, you can see the following screen that allows you to define the whole intent.
In the Sample utterances, you need to place the sample sentences that will be used to train the model. The sentences can also contain the slot variables, e.g. What is the weather; What is the weather in {location}, What is the weather in Berlin.

Next, you can specify if you use a custom hook for validation (Lambda initialization and validation) of the user input.

The Slots section contains a list of all slots that are used in the intent. Each of the slot should have a unique name, type and optionally, a custom prompt. Moreover, you can declare if the slot is required or optional.

The slot’s type can be selected from a list of predefined slots or you can create a custom one. In this example, we use AMAZON.EUROPE_CITY. In the Confirmation prompt, you can specify if you want to receive a confirmation message before the fulfillment action. Last, in the Fulfillment, you can specify what happens after all slots are set

Now you have a complete definition of your intent that will be used whenever user asks for the weather in a specific European city.
Step 3: Add the engine: AWS Lambda
In Lex, Lambdas are essential for the communication between Lex and the backend. Lambdas can be used in two ways:
- first, to validate user input - this entry point can be used not only for the custom validation but also to steer the workflow by redirecting users to different intents.
- second, to fulfill user requests - used when all required slots are filled out and the request is ready to be processed.
Here you can associate the Lambdas with the fulfillment event, that is called when all of the slots are filled out.
Below is a code of a simple Lambda service that delivers temperature and the wind speed/direction for a given city.
[code language="python"]import osimport weatherdef get_weather(event, context): """Returns the weather for a given location.""" slot_values = populate_slots(event) location = slot_values.get('location') if location: wl = weather.Weather().lookup_by_location(location) if not wl: return aws_lex_return_close('Location {} not found'.format(location), 'Failed') output = ( '{city} {country} (last-update: {date}) ' ' {text} Temp: {temp}{temp_units} Wind: {speed}{speed_units}' ).format(city=wl.location.city, country=wl.location.country, date=wl.condition.date, text=wl.condition.text, temp=wl.condition.temp, temp_units=wl.units.temperature, speed=wl.wind.speed, speed_units=wl.units.speed) return aws_lex_return_close(output) return aws_lex_return_close('Location {location} not found'.format(location=location), 'Failed')def populate_slots(event): slot_values = {} for slot_name, v in event['currentIntent']['slots'].items(): slot_values[slot_name] = v # Populate resolved values for slot_name, v in event['currentIntent']['slotDetails'].items(): if v is not None and len(v['resolutions']) > 0 and not slot_values.get(slot_name): slot_values[slot_name] = v['resolutions'][0]['value'] return slot_valuesdef aws_lex_return_close(message_content, return_type=None, session=None): valid_return_types = ('Fulfilled', 'Failed') if return_type is None: return_type = 'Fulfilled' if return_type not in valid_return_types: raise ValueError('Wrong return_type, got {}, expected {}'.format(return_type, ''.join(valid_return_types))) out = { 'dialogAction': { 'type': 'Close', 'fulfillmentState': return_type, 'message': { 'contentType': 'PlainText', 'content': message_content } } }[/code]The message format that is fetched by Lambda:[code language="python"]{'messageVersion': '1.0', 'invocationSource': 'FulfillmentCodeHook', 'userId': 'k2lr53f71vqynb9p4kerbh8phbffk06c', 'sessionAttributes': {}, 'requestAttributes': None, ' bot': {'name': 'TodaysWeather', 'alias': '$LATEST', 'version': '$LATEST'}, 'outputDialogMode': 'Text', 'currentIntent': { 'name': 'TodaysWeather', 'slots': {'location': 'Berlin'}, 'slotDetails': {'location': {'resolutions': [], 'originalValue': 'Berlin'}}, 'confirmationStatus': 'None' }, 'inputTranscript': 'What is the weather in Berlin?'}[/code]The field invocationSource can be used to detect if a given message is at the last stage of processing (where the slot values are populated, like in the example above) or if it’s in the validation phase (DialogCodeHook).In the fulfillment state, the current intent contains the populated slot values in the slots field.In the example above, we expect to get only the location slot type from AMAZON.EUROPE_CITY. The raw input text is available in the field inputTranscript.What you have to return from the function is the following response:[code language="python"]{ 'dialogAction': { 'type': 'Close', 'fulfillmentState': Fulfilled|Failed, 'message': { 'contentType': 'PlainText|SSML|CustomPayload', 'content': “Some message” } } }[/code]In this particular case, you send a response to AWS Lex with information that you don’t expect any response from the user (type: Close). AWS Lex will only send a message that is declared in the message.content field. The message could be a PlainText, voice (in SSML format) or custom data (the last option could be useful to customize the messages sent to external services like Slack).Use the following settings file to deploy this part with Serverless framework:[code language="python"]service: WeatherBotprovider: name: aws runtime: python3.6 region: eu-west-1 environment: BOT_NAME: TodaysWeather BOT_ALIAS: alpha iamRoleStatements: - Effect: "Allow" Action: - lex:* Resource: - "arn:aws:lex:*:*:bot:TodaysWeather:alpha" - Effect: "Allow" Action: - lambda:InvokeFunction - lambda:InvokeAsync - lex:* Resource: "*"functions: get_weather: handler: handler.get_weather events: - http: GET get_weatherplugins: - serverless-python-requirementscustom: pythonRequirements: dockerizePip: non-linuxpackage: exclude: - node_modules/** - venv/**[/code]
Step 4: Test the bot
Fast prototyping with ngrok
Testing a bot could be a quite tedious task as every change in the code would have to be deployed in order to check how the bot reacts. We can simplify tests by creating a general function that will take whatever AWS Lex is sending and proxy it to the local computer, using eg. ngrok, where a business logic can be implemented.Here’s an exemplary logic diagram:

The function below is responsible for proxying the data received in the event object to the external TEST_ENDPOINT.
[code language="python"]def general_proxy_handler(event, context): """This will proxy all requests to the TEST_ENDPOINT.""" outside_http = os.environ.get('TEST_ENDPOINT') logger.info('general_setup event={} url={}'.format(event, outside_http)) params = json.dumps(event).encode('utf8') logger.info('params={}'.format(params)) req = urllib.request.Request(outside_http, data=params, headers={'content-type': 'application/json'}) response = urllib.request.urlopen(req) response_json = json.loads(response.read()) logger.info('general_setup response={}'.format(response_json)) return response_json[/code]
You also have to add the Lambda function to the serverless configuration:
[code language="python"]functions:(...) test_endopoint: handler: handler.general_proxy_handler events: - http: GET test_endpoint[/code]
Then, ngrok passes this data to the local computer. In order to handle the data, you have to set up a simple HTTP server that will listen on a specific port (which is called by ngrok) and pass the data to the appropriate handler.
[code language="python"]class Handler(http.server.BaseHTTPRequestHandler): def _set_response(self): self.send_response(200) self.send_header('Content-type', 'application/json') self.end_headers() def do_POST(self): content_length = int(self.headers['Content-Length']) # Gets the size of data post_data = self.rfile.read(content_length) # Gets the data itself input_json = json.loads(post_data.decode('utf-8')) output = handler(input_json, '') self._set_response() self.wfile.write(json.dumps(output).encode('utf-8'))httpd = http.server.HTTPServer(('', port), Handler)httpd.serve_forever()[/code]
This is nothing more than a HTTP server that is listening on a port. Whenever an HTTP request is retrieved, the payload is forwarded to the handler. The handler will process the request and send the response back, through which the ngrok will end up in AWS Lex.
You can find the full code on my GitHub page.
Step 5: Connect with Slack
AWS Lex can be used in two scenarios - as a standalone tool that is called via AWS SDK or as a tool integrated with channels like Slack. While integrating bots like these with Slack can enhance user experience, it's also essential to be aware of and know how to fix the most common Slack issues.
Now, let's proceed to see how we can connect our bot with Slack. In order to link our bot to Slack, first you have to create an application on the Slack side (go to Slack’s API):

Next, you have to create a bot user in the app. Set the Display name and the Default username:

Next, go to the Interactive components tab and enable it. Set the request URL (anything valid like http://slack.com, you can change it later). With this, you can retrieve important information from Basic Information tab:
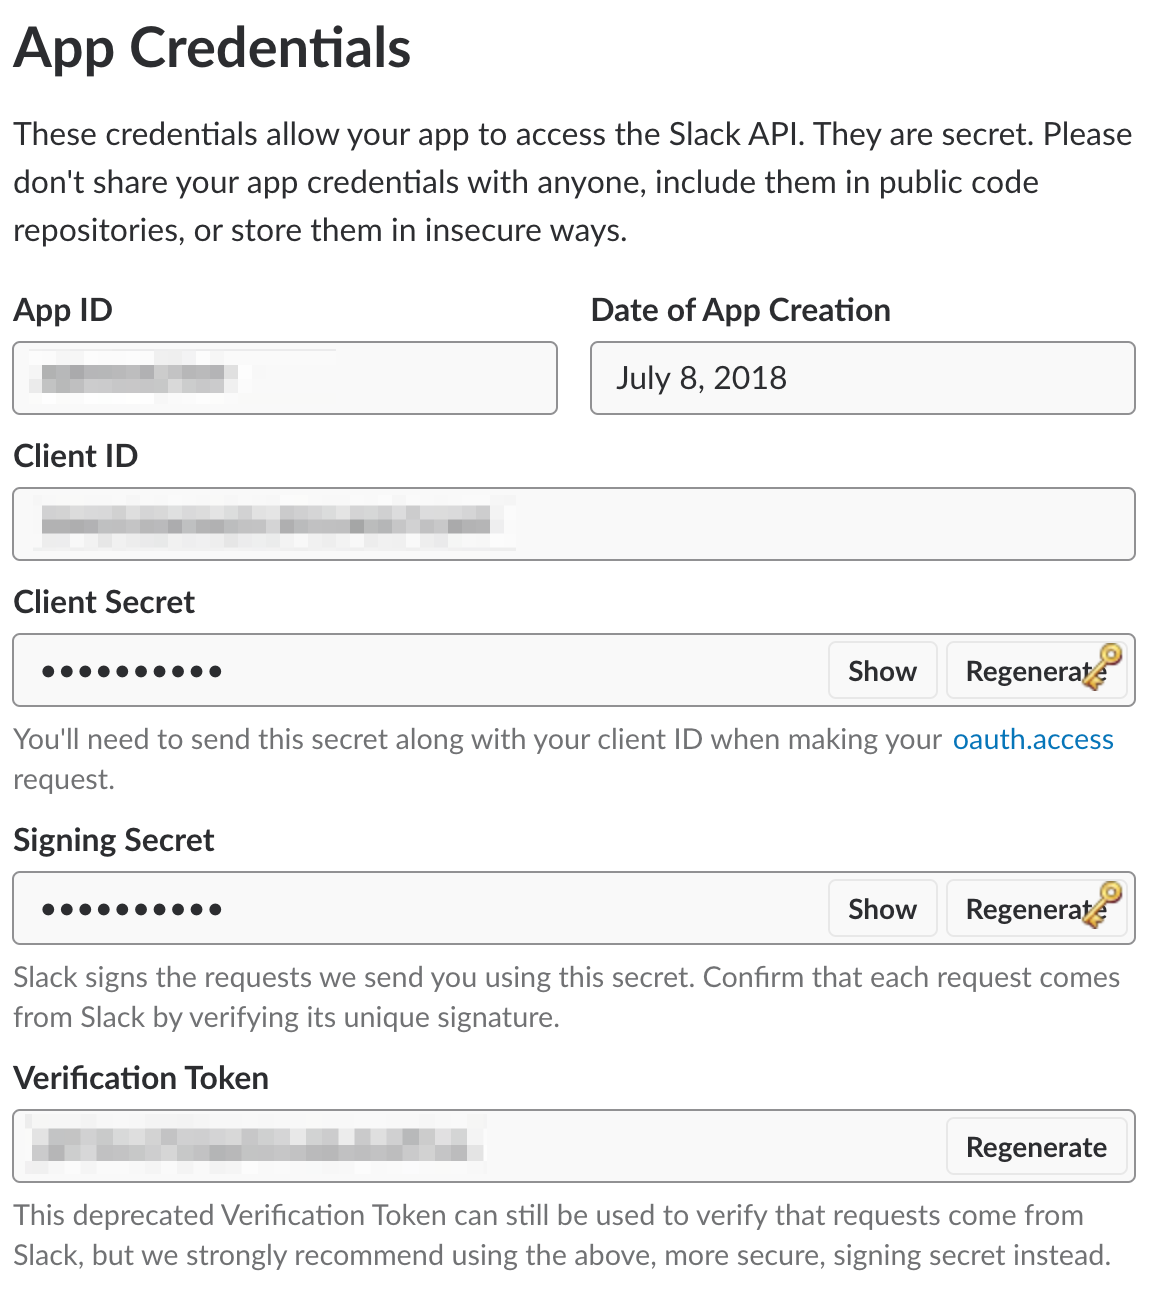
Use the above information in the AWS Lex channel tab:

You have to copy the data from Slack directly to this tab and then click Activate button. You will see the URLs that you have to use in your Slack bot configuration displayed below the activate button:

Go back to the Slack setup. Enter the OAuth & Permissions tab and set the Redirect URLs section. Click Add a new Redirect URL and put the OAuth Url from AWS Lex into that field. Click Save URLs.Next, go to the Scopes section and select two permissions from the Select Permission Scopes:
- chat:write:bot
- chat:write:user
- im:write
- team:read
After saving changes, you need to set up interactive components by setting the request URL to Postback URL from AWS Lex.You also have to set the event subscription. Go to the Event Subscriptions tab, enable it by choosing the On option, set the Request URL to Postback URL and subscribe to message.im event.Lastly, you have to add your app to a workspace. Go to Basic Information, click Install your app to your workspace. You will be redirected to the page below:

By clicking Authorize, you will install the app in your workspace.
Conclusions
As I showed you in this example, creating a bot is a rather straightforward task. AWS Lex very nicely integrates with Amazon ecosystem. This can be considered as a drawback, as we rely our product on one service provider. However, the interoperability between different providers is a challenging task not only in the context of chatbots but generally in the world of cloud dependent services.
If you work inside an Amazon ecosystem, AWS Lex is definitely worth trying out. It offers an easy to follow setup process, and can be integrated with a variety of external services of your choosing.
Want to build a chatbot for your product? Apptension can do it for you! Check out our chatbot development case study to make sure for youself. Then, just drop us a line about your project to get you started.